


What are React Hooks?
In the React 16.8 version, hooks are the new functionality. It permits the use of state and other React features without the need to create a class. In the past, you'll have to write class-based components to perform some of these methods.
Hooks are JavaScript functions that manage the state's behavior and side effects by isolating them from a component. React hooks allow you "hook into" react features and are not permitted when using class-based components.
Does React Hooks give me superpowers?
Short Answer: No
Long Answer: Hooks are not a replacement for understanding React fundamentals. Hooks instead offer a more direct API to the React concepts you are already familiar with, including props, state, context, refs, and lifecycle. Hooks also provide a fresh, potent approach to combining them.
Why should I learn about hooks?
Reuse of Stateful Logic between related or unrelated Components'
You can remove stateful logic from a component using hooks so that it can be tested separately and used again. You can reuse stateful logic with hooks without altering the component structure. Sharing Hooks amongst numerous components or with the community is now simple as a result.
Escape the complexity of Lifecycle methods
You don't need to get yourself into the complexity of ComponentDidMount, ComponentDidUpdate, ComponentWillUnMount methods. Hooks allow you to divide a single function into separate functions based on which parts are linked (such as creating a subscription or obtaining data). To make the local state of the component more predictable, you can choose to manage it via a reducer.
Here's my Point "Hooks let you use more of React’s features without classes."
Even though you're having a great feeling about hooks, it also has some rules you have to follow through
These rules are:
1. Only call Hooks at the top level
Hooks must be used at the top level of the React functions. Do not call Hooks inside loops, conditions, or nested functions.
2. Only call Hooks from React functions
You cannot call Hooks from regular JavaScript functions. Instead, you can call Hooks from React functional components and Custom Hooks
Basic React Hooks
UseState
This is the simplest hook, it's a Hook that lets you add React state to functional components without needing to transform it into a class component.
Let’s look at the snippet below
import React, { useState } from 'react';
const TapApp=()=> {
// Declare a new state variable, which we'll call "tap"
const [tap, setTap] = useState(0);
return (
<div>
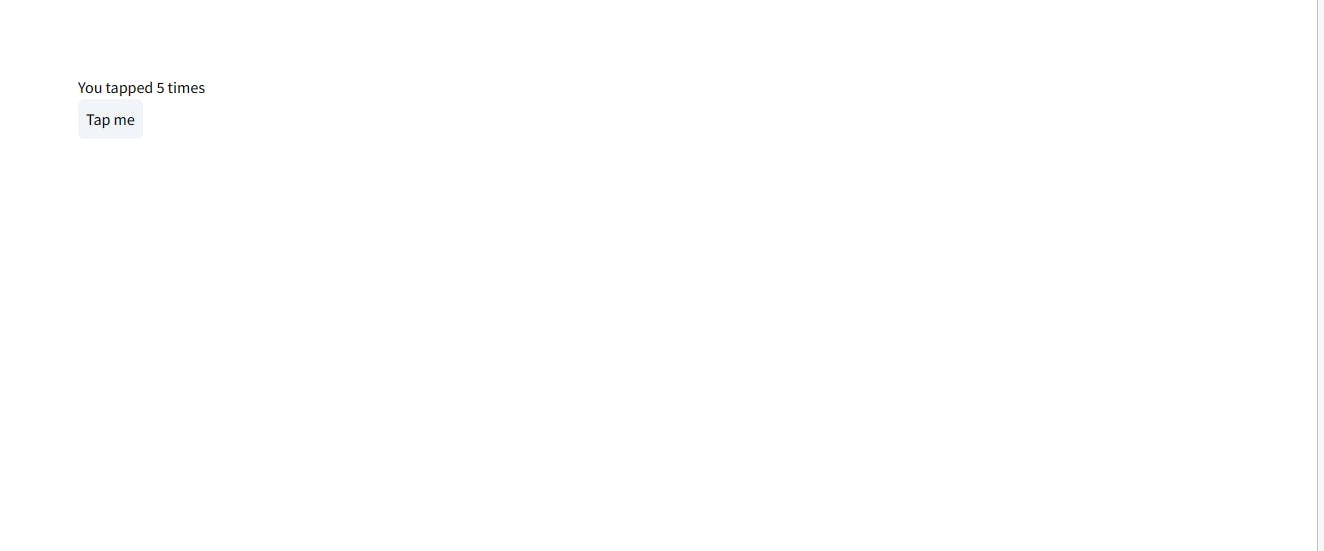
<p>You tapped {tap} times</p>
<button onClick={() => setTap(tap+ 1)}>
Tap me
</button>
</div>
);
}
export default TapApp;
Here is the result

Let's tap the button
Maybe you're asking what's the use of the square brackets ?
const [tap, setTap] = useState(0);
The arrays on the left are called state variables, and by variables we mean you can change them to something else for our specific use case. The first state variable is the state name and the second is the function for assigning that state. So in this case tapis the variable name and setTap is the function for setting that variable name.
Other similar use cases can include the following
 const [fruit, setFruit] = useState('banana');
 const [todos, setTodos] = useState([{ text: 'Learn Hooks' }]);
Another question you might have is the 0 between the parenthesis what's it for? can it be changed as well? Yes it can, it's the default value for that state
So let me explain, if you want to render a component ie. when the component first loads up the first state it would show would be the default state
If you've gotten to this part, please note that you already have a basic understanding of how useState hook works, please note that the next section is to apply what you've learnt
Simple Usecase for useState
Since we now fairly have an understanding of how the useState hook work, now let's build a simple inventory store. For this app, I'll be using tailwind to style the app, please click here to get started with tailwind for react.
    const [item, setItem] = useState();
    const [itemInventory, setItemInventory] = useState([]);
We need to set of state variables, item handles the single item while itemInventory handles an array of items(multiple items)
 const handleChange = (e) => {
    setItem(e.target.value)
  }
  const saveItem = () => {
    if (!item) return;
    if (itemInventory.includes(item)) return;
    setItem('')
    setItemInventory(prevValues => {
      return [...prevValues, item]
    }
    )
  }
handleChange function sets the single item state, it's going to be attached to the input element, while saveItem function checks if that particular item is empty and in the itemInventory array, if it's not in the array then it procedes to add that item
<div>
      <div className='flex flex-col gap-y-3 '>
        <div className='mx-auto space-y-3 mt-4'>

          <label for="fruitInput" className='text-3xl text-center'>Please enter your Items</label>
          <div className='flex space-x-2'>
            <input
              placeholder='water bottle...'
              className='w-80 p-2 px-4 border-2 border-slate-100 rounded-md focus:outline-slate-400 '
              name="fruitInput" value={item} onChange={handleChange} />
            <button onClick={saveItem} className='rounded-md w-fit p-2 bg-slate-100 hover:bg-slate-200 active:text-slate-100 '>+ Add</button>
          </div>
        </div>
        <div className='flex max-w-[1000px] flex-wrap gap-4 mx-auto mt-10'>

          {itemInventory.map((i, v) => (
            <ItemCard item={i} />
          ))}
        </div>
      </div>
    </div>
Here we set the value of the input to item and it's onChange to handleChange, we're also assigning the onClick function to the saveItem function we just created, so that when we click on the button it triggers the saveItems function that adds that particular item to the array.
We are also mapping through the itemInventory state with the ItemCard component
ItemCard.jsx
import React, { useState } from 'react';

function ItemCard({ item }) {

    const [totalNumber, setTotalNumber] = useState(0)

    const handleRemove = () => {
        if (totalNumber > 0) {
            setTotalNumber(totalNumber - 1)
        }
    }
    const handleAdd = () => {
        setTotalNumber(totalNumber + 1)
    }

    return (
        <div className='w-[300px] bg-black/[0.05] hover:bg-slate-100 h-1/3 p-10 '>
            <p className='font-bold text-2xl text-gray-700'>
                {item}
            </p>
  <p className='font-semibold text-lg text-gray-500'>Total:{totalNumber}</p>
            <div className='flex gap-2'>
                <button className='w-fit bg-gray-500 text-white p-1 px-2 rounded-md' onClick={() => handleAdd()}>Add</button>
                <button className='w-fit bg-gray-500 text-white p-1 px-2 rounded-md' onClick={() => handleRemove()}>Remove</button>
            </div>
        </div>
    )
}

export default ItemCard
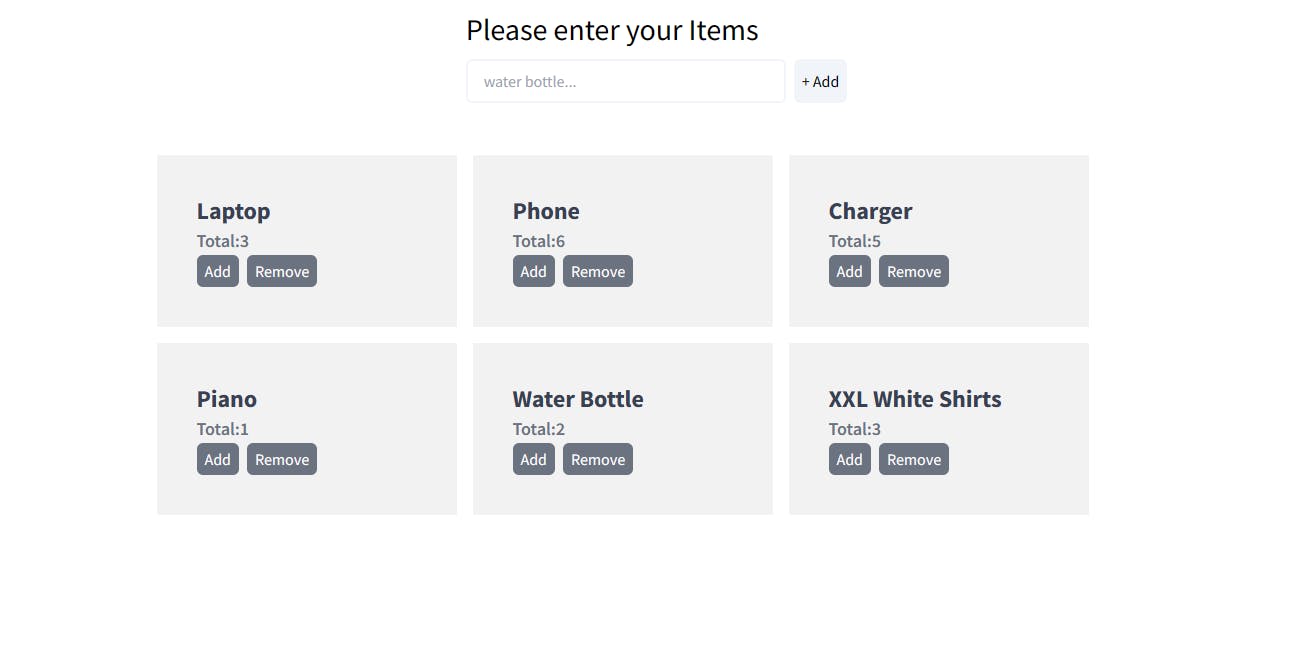
ItemCard helps us to set the total number present for that particular item, so for example, I add an item called "phone" ItemCard.jsx helps us visualize the item name and also allows us to add and remove the total number present for that item.
So Let's look at the final file
Item.jsx
import React, { useState } from 'react';
import ItemCard from './ItemCard';

const FruitInventory = () => {
  const [item, setItem] = useState();
  const [itemInventory, setItemInventory] = useState([]);
  const handleChange = (e) => {
    setItem(e.target.value)
  }
  const saveItem = () => {
    if (!item) return;
    if (itemInventory.includes(item)) return;
    setItem('')

    setItemInventory(prevValues => {
      return [...prevValues, item]
    }
    )
  }
  return (
    <div>
      <div className='flex flex-col gap-y-3 '>
        <div className='mx-auto space-y-3 mt-4'>

 <label for="fruitInput" className='text-3xl text-center'>Please enter your Items</label>
          <div className='flex space-x-2'>
            <input
              placeholder='water bottle...'
              className='w-80 p-2 px-4 border-2 border-slate-100 rounded-md focus:outline-slate-400 '
              name="fruitInput" value={item} onChange={handleChange} />
            <button onClick={saveItem} className='rounded-md w-fit p-2 bg-slate-100 hover:bg-slate-200 active:text-slate-100 '>+ Add</button>
          </div>
        </div>
        <div className='flex max-w-[1000px] flex-wrap gap-4 mx-auto mt-10'>

          {itemInventory.map((i, v) => (
            <ItemCard item={i} />
          ))}
        </div>
      </div>
    </div>
  );
}
export default FruitInventory;
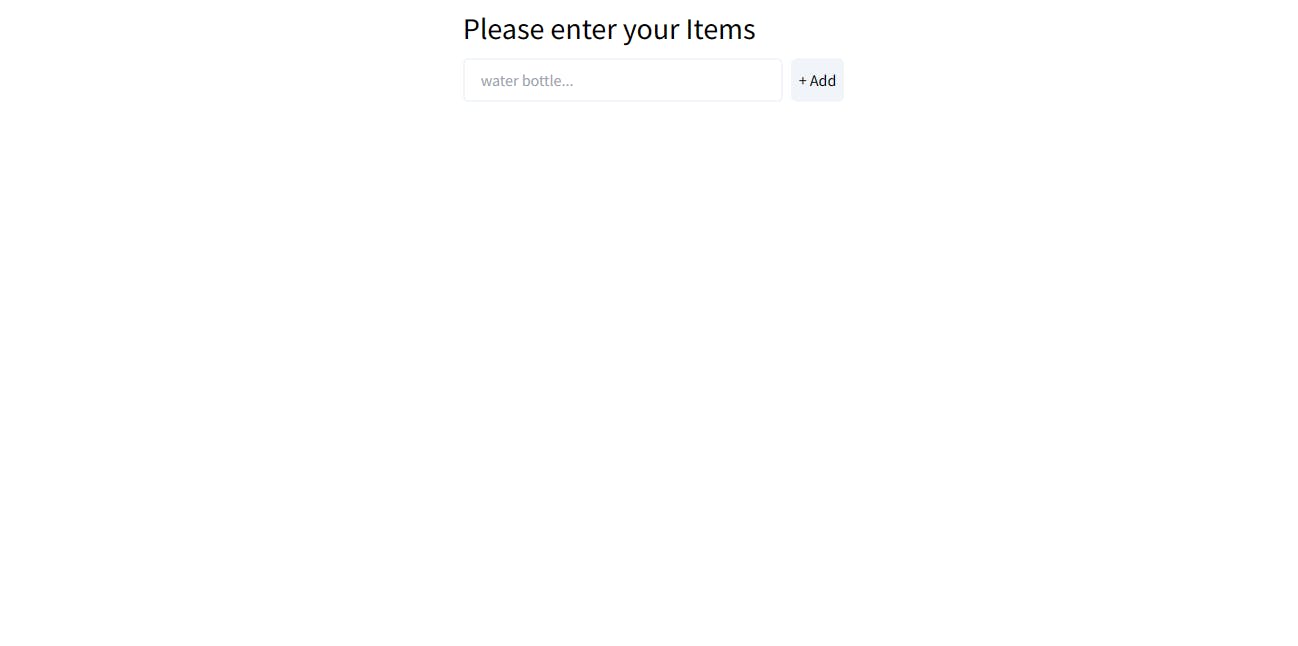
Result
Default State
Final Result
Final Thoughts
We can see how easy it is to apply what we just learned to a simple inventory app, you can take this knowledge and build out a todo app, or a mini e-commerce application, it's the same principles, although for that you might want to use a more robust solution for handling state.
That's all, if you want to see more details or read about the useState React Hook, please, take a look at the Official Documentation
Reach out to me
Linkedin : linkedin.com/in/mitchel-inaju
Twitter: twitter.com/mitchelinaju