How To Create Custom Hooks in React / Next JS
3 simple steps for converting re-useable logic to custom hooks
What are React Hooks?
React Hooks allows developers "hook into" React's lifecycle and state management features from functional components. They provide a more concise and reusable way to manage component logic. Some popular examples are useState and useEffect Hooks.
Prerequisites
Good understanding of react js hooks like useState and useEffect.
You have a react project running that you want to create a custom hook for.
Why should we use custom hooks?
React Hooks helps us to reuse logic across our code base. You've written a piece of Code that you later found out other files that might need that logic, a good practice is to abstract that logic into a custom hook.
For example, you've written a functionality that allows you to communicate with an API, this logic includes, returning errors, returning the success messages, and sending data to the API. It's always a good practice to abstract this logic into a hook so you can reuse it across your codebase so that you don't have to rewrite it in every file you need that logic. This helps to make your code more organized and less bulky with repeated logic. One clean Code principle is DRY ie Do not Repeat Yourself, which means if a code is used multiple times across a file, you turn it into a single code block or into a file and export it from that file to be used across your application.
Here are some rules you need to take note of when creating custom hooks
Never call Hooks inside loops, conditions, or nested functions.
Always use Hooks at the top level of your React component.
Never call Hooks from regular JavaScript functions.
Instead, call Hooks from React functional components or call Hooks from custom Hooks.
Make use of the "use" prefix to name your functions and the filename eg: useEffect, useState, useFetch.
What are we going to do?
We're going to utilize JSON Placeholder Fake Data API to fetch dummy data that we are going to use for our application.
When interacting with an API, we would need a library to interact with that API, for that we are going to use Axios for this.
To install Axios When using NPM, run this command on your terminal.
npm install axios
When using Yarn, run this command on your terminal.
yarn add axios
Create a Home.js file on your react app and paste the code below
// Home.js

import { useState, useEffect } from "react";
import axios from "axios";

const Home = () => {
  const [data, setData] = useState(null);
  const [isLoading, setIsLoading] = useState(null);
  const [error, setError] = useState(null);

  useEffect(() => {
    handleGetData();
  }, []);

  const handleGetData = async () => {
    setIsLoading(true);
    try {
      const getData = await axios.get(
        "https://jsonplaceholder.typicode.com/todos"
      );

      if (getData.status == "200") {
        setData(getData.data);
        setIsLoading(false);
      }
    } catch (error) {
      setError(error);
      throw console.error(error);
    }
  };

  return (
    <>
      {isLoading && <p>Loading...</p>}
      {error && (
        <div>
          There was an Error <button onClick={handleGetData}>Try Again</button>{" "}
        </div>
      )}
      {data &&
        !isLoading &&
        data.map((item) => {
          return <p key={item.id}>{item.title}</p>;
        })}
    </>
  );
};

export default Home;
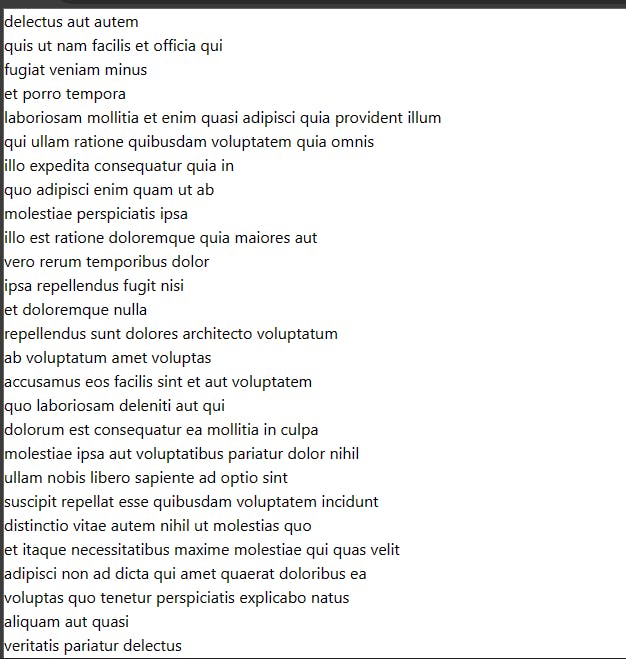
you should see this on the web page

This Home.js File does 6 basic things
Fetching the data from JSON Placeholder API.
Set that response data to a state and a loading state
Catches any error on the file and sets it to an error state.
Displays if there was an error getting the data for the user to see.
Shows the loading state for the user to see.
Displays the Data for the user to see
This is the basic functionality for pages that query an API hence the need for us to abstract this logic. On a typical API you would have different endpoints like /createAccount or /getUser and to implement it you'll have to rewrite this logic for all files. So let's abstract this into a reusable logic.
On the JSON Placeholder API, we have access to these routes, so it would make sense for us to allow our custom hook to accept any suffix link
100 posts | |
500 comments | |
100 albums | |
5000 photos | |
200 todos | |
10 users |
Step 1: Identify the Code to be reused.
It's good practice to put files that are performing similar logic into the same folder, you should have a hooks folder to hold all the custom hooks you'll create for your project. So create a hooks folder and a file called useRequest.js
Your directory should look something like this.
-src
--\hooks\useRequest.js
Let's copy the necessary re-useable logic from our index.js file into our useRequest.js file, which should look like this.
// useRequest.js

import { useState } from "react";
import axios from "axios";

const useRequest = () => {
  const [data, setData] = useState(null);
  const [isLoading, setIsLoading] = useState(null);
  const [error, setError] = useState(null);


  const handleGetData = async () => {
    setIsLoading(true);
    try {
      const getData = await axios.get(
        "https://jsonplaceholder.typicode.com/todos"
      );

      if (getData.status == "200") {
        setData(getData.data);
        setIsLoading(false);
      }
    } catch (error) {
      setError(error);
      throw console.error(error);
    }
  };

  return { data, isLoading, error, handleGetData };
};

export default useRequest;
Explanation of the code
  const [data, setData] = useState(null);
  const [isLoading, setIsLoading] = useState(null);
  const [error, setError] = useState(null);
These are the states that would handle the response from the API, the loading state, and the error state.
  const handleGetData = async () => {
    setIsLoading(true);
    try {
      const getData = await axios.get(
        "https://jsonplaceholder.typicode.com/todos"
      );

      if (getData.status == "200") {
        setData(getData.data);
        setIsLoading(false);
      }
       else{
        setError("There was an error");
      }
    } catch (error) {
      setError(error);
      throw console.error(error);
    }
  };
handleGetData is an async function, here's what it does.
It first sets the loading state to true, because we want to show a loading state while our hook is calling the endpoint.
We're wrapping the main logic in a try/catch block because we want to handle the errors we might get, errors such as network errors, a request timeout or a data not found error.
The next line calls the API with axios, checks if the status is 200(ie, there was a response with data), and sets the data and loading state to false, if the error state is not 200, it means there was an error, so we handle that.
return { data, isLoading, error, handleGetData };
The return statement is important because you might not always want to make all the functions or variables accessible on your hook, so the return allows us to specify what we want to expose. Here we are exposing the response of our API call(data), loading, and error states, and handleGetData function which we explained earlier.
Step 2: How to use it
Since we're done abstracting the reusable functionality into a hook, here's how to use it.
const { data, isLoading, error, handleGetData } = useRequest();
Just looking at this, you'll see that it's pretty similar to how you'll use the basic react hooks like useState or useEffect.
Here's how our Home.js file now looks
// Home.js

import { useState, useEffect } from "react";
import useRequest from "../../hooks/useRequest";

const Home = () => {

  const { data, isLoading, error, handleGetData } = useRequest();

  useEffect(() => {
    handleGetData();
  }, []);

  return (
    <div>
      {isLoading && <p>Loading...</p>}
      {error && (
        <div>
          There was an Error <button onClick={handleGetData}>Try Again</button>{" "}
        </div>
      )}
      {data &&
        !isLoading &&
        data.map((item) => {
          return <p key={item.id}>{item.title}</p>;
        })}
    </div>
  );
};

export default Home;
We can see that we've reduced the code to virtually under 30 lines of code for us, which is a good thing, we've abstracted the logic for calling the API into a custom hook that we are going to make more re-useable now.
If you've read to this point, you already know the basics of creating custom hooks in React, what we are going to do in the next section is to make the hook accept any endpoint and base API link.
Step 3: Make the hook more reusable.
What we are going to do here is to allow our useRequest.js function to accept two arguments, ie. BASE_API and suffix.
Our BASE_API is the most common url we can find on all our endpoints.
The suffix is the different endpoints.
For example BASE_API: www.simpleapi.com, suffix: /posts, so together the full URL would look like www.simpleapi.com/posts.
Here are the changes we would be making to our useRequest.js
In your Home.js file replace const { data, isLoading, error, handleGetData } = useRequest() with const useRequest = (BASE_API, suffix) => { ...... } This just shows the function accepting the BASE_API and suffix.
In your useRequest.js replace const getData = await axios.get("https://jsonplaceholder.typicode.com/todos"); with const getData = await axios.get(BASE_API + suffix);
Implement this for Axios to correctly get the BASE_API and suffix endpoint.
Our final useRequest.js file looks like this.
// useRequest.js

import { useState } from "react";
import axios from "axios";

const useRequest = (BASE_API, suffix) => {
  const [data, setData] = useState(null);
  const [isLoading, setIsLoading] = useState(null);
  const [error, setError] = useState(null);

  const handleGetData = async () => {
    setIsLoading(true);
    try {
      const getData = await axios.get(BASE_API + suffix);

      if (getData.status == "200") {

        setData(getData.data);
        setIsLoading(false);

      } else {
        setError("There was an error");
      }
    } catch (error) {

      setError(error);

      throw console.error(error);
    }
  };
  return { data, isLoading, error, handleGetData };
};

export default useRequest;
A good practice is to keep your BASE_API endpoint on your .env file and your suffix on the file you want to use it on.
For example, let's say we want to create a page for comments all we need to do is to create const suffix="/comments" and use it like this
// DisplayComment.js

const BASE_API = "https://jsonplaceholder.typicode.com";
  const suffix = "/comments";

  const { data, isLoading, error, handleGetData } = useRequest(
    BASE_API,
    suffix
  );
Conclusion
In this tutorial, we created a react hook for handling custom interactions with an API, we did this because we wanted to abstract the functionalities into a separate file. This helps us to modularize our code and ensure that we don't repeat the same code in multiple files.
If you found this article helpful please like or leave a comment, share it with your friends/network who might need this, and connect with me on Linkedin, Twitter and Dev.to.
