What is Django?

Django is a Python Web framework that encourages rapid development and clean, pragmatic design. Built by experienced developers, it takes care of much of the hassle of Web development, so you can focus on writing your app without needing to reinvent the wheel. It’s free and open source.
Some Features you would love
Ridiculously fast.
- Django was designed to help developers take applications from concept to completion as quickly as possible. Reassuringly secure.
- Django takes security seriously and helps developers avoid many common security mistakes.
- Exceedingly scalable.
Some of the busiest sites on the Web leverage Django’s ability to quickly and flexibly scale. See More...
MVC(Model View Controller) Pattern
Django uses the MVC or MVT pattern to organize files in Django, let me explain.
MVC Pattern or architecture is based on three components: Model, View, and Controller.
DJANGO MVC - MVT Pattern
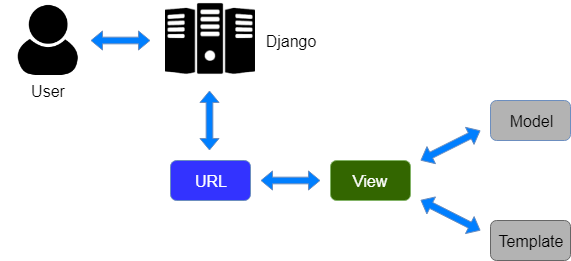
The Model-View-Template (MVT) is slightly different from MVC. In fact the main difference between the two patterns is that Django itself takes care of the Controller leaving us with the template. The template is a HTML file mixed with Django Template Language (DTL).

Source: https://www.javatpoint.com/django-mvt
A Request is sent, for a resource, Django works as a controller and check to the available resource in URL.
If the URL is mapped to a view then a template is rendered
Django responds to the request and sends a template as a response.
The Model works on the database
The template is used to handle the html and user interface
The View is used to carry out business logic, run operations on the models(Database) and passes data to the template
Setting up your environment
I’m assuming you have python installed already, if not, click this link https://realpython.com/installing-python/
The first task here is to install a virtual environment
Python applications installed into the global environment can potentially conflict with each other (i.e. if they depend on different versions of the same package).
This allows you to work on different projects with different versions of Django or other packages without messing up your project
- Open your command prompt
- Run pip install virtualenv
- Go to the folder you want to work on and run virtualenv env
- Activate the virtual environment env\Scripts\activate
- Install Django pip install django
- Run pip freeze to confirm the installation
Creating The Project Folder
mkdir Django-project
cd Django-project
django-admin startproject mysite
cd mysite
python manage.py runserver
You should see something like this in the terminal
Watching for file changes with StatReloader
Performing system checks...
System check identified no issues (0 silenced).
You have 17 unapplied migration(s). Your project may not work properly until you apply the migrations for app(s): admin, auth, contenttypes, sessions.
Run 'python manage.py migrate' to apply them.
June 14, 2020 - 12:21:01
Django version 3.0.7, using settings 'mysite.settings'
Starting development server at http://127.0.0.1:8000/
Quit the server with CTRL-BREAK.
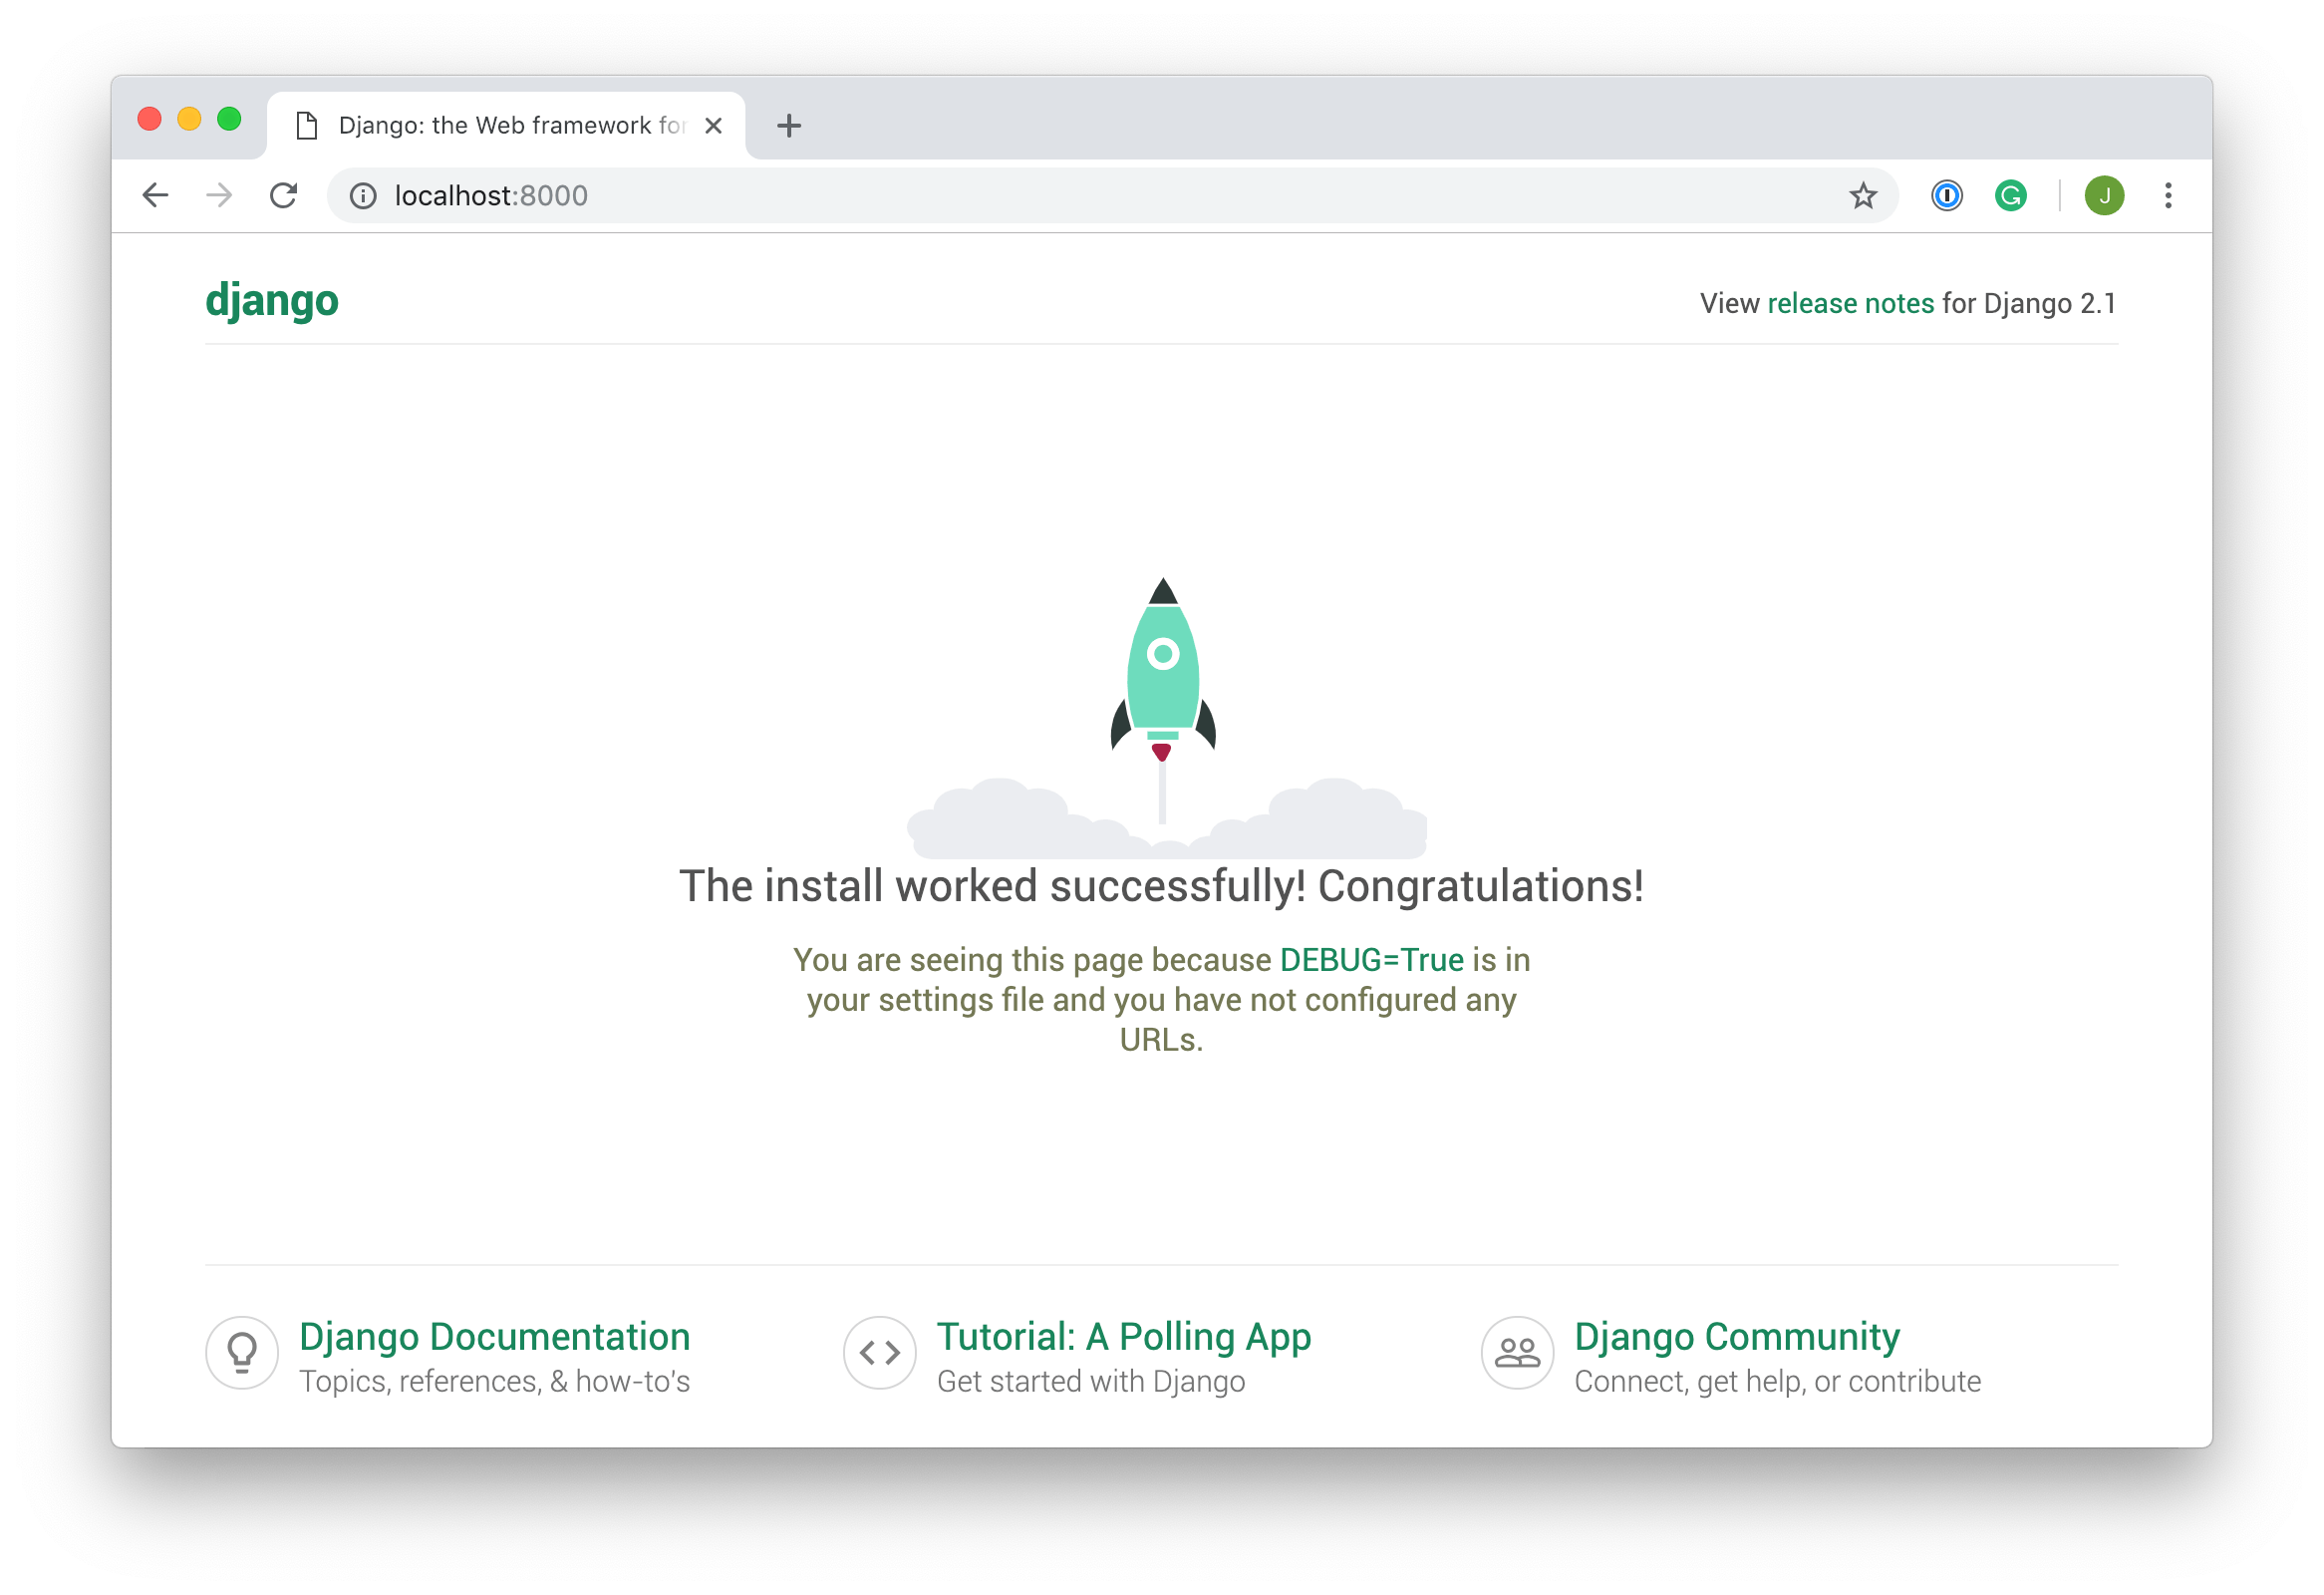
If you navigate to http://127.0.0.1:8000/ on your browser, you should see something like this

Congratulations!!!! You have successfully set up your project folder That was easy wasn’t it?
You should see your directory like this now
mysite/
    manage.py
    mysite/
        __init__.py
        settings.py
        urls.py
        asgi.py
        wsgi.py
init.py is an empty file that instructs Python to treat this directory as a Python package.
settings.py contains all the website settings. This is where we register any applications we create, the location of our static files, database configuration details, etc.
- urls.py This contains all url mappings, it would be better if you can create separate url.py files for separate filed.
- wsgi.py helps your project to communicate with a server
- asgi.py is a standard for Python asynchronous web apps and servers to communicate with each other and positioned as an asynchronous successor to WSGI, where WSGI provided a standard for synchronous Python apps, ASGI provides one for both asynchronous and synchronous apps,.
- The manage.py script is used to create applications, work with databases, and start the development web server.
Creating a simple Web app
Now let us create a simple app
Projects vs. apps
An app is a Web application that does something a small poll app, authentication app, blog app A project is a collection of configuration and apps for a particular website
Run this in your command prompt
Python manage.py startapp mysimpleapp
This should be your project file structure now
mysimpleapp /
    __init__.py
    admin.py
    apps.py
    migrations/
        __init__.py
    models.py
    tests.py
    views.py
Go to mysite/settings.py and include this app in the installed app
INSTALLED_APPS [
‘django.contrib.admin ‘,
‘django.contrib.auth’,
‘django.contrib.contenttypes ‘,
‘django.contrib.sessions ‘,
‘django.contrib.messages’,
‘django.contrib.staticfiles’,
**‘mysimpleapp’,**
]
Go to your views.py file in mysimpleapp folder and let’s write this little piece of code
 from django.http import HttpResponse

def index(request):
    return HttpResponse("Hello, world. You're at my simple site index.")
This is one of the simplest views we can have in django, to call this view we need to map it to a url
In your mysimpleapp folder create a urls.py file and write this code in it
from django.urls import path
from . import views

urlpatterns = [
    path( “ ”, views.index, name='index'),
]
Then go to mysite/url.py file i.e the url.py file in mysite folder
from django.contrib import admin
from django.urls import include, path

urlpatterns = [
    path(mysimpleapp/', include(mysimpleapp.urls')),
    path('admin/', admin.site.urls),
]
So we are including our mysimpleapp into our main url.py file You can now run the server
Python manage.py startapp mysimpleapp
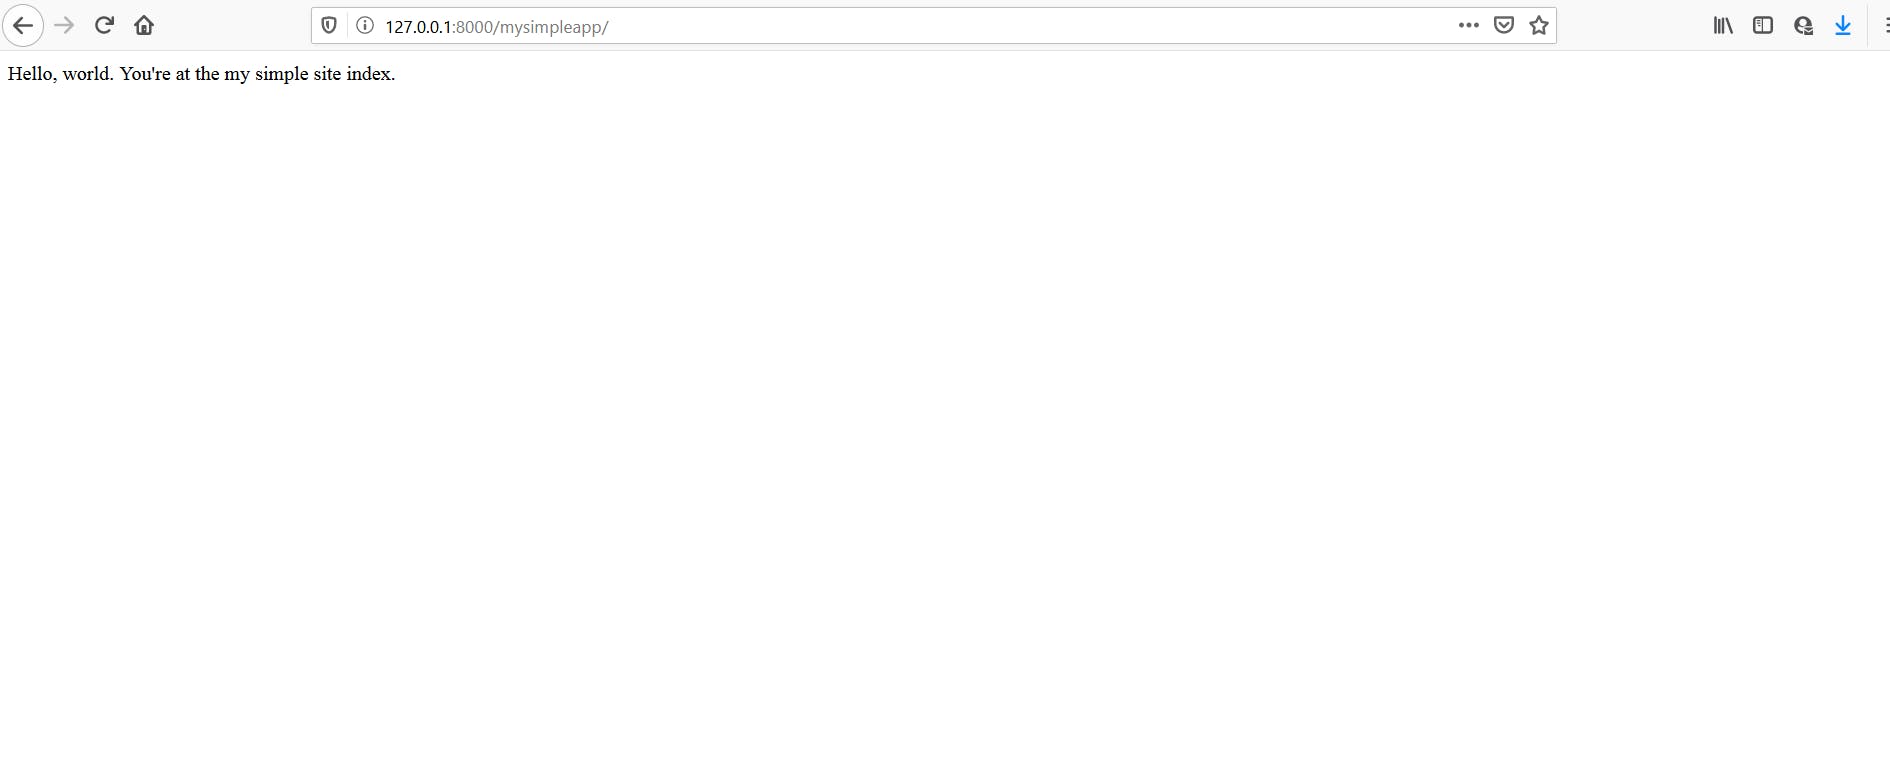
When you navigate to http://127.0.0.1:8000/
You should see this

Congratulations, You have successfully setup your first webserver and web app
You can reach me at:
Email: mitchelinajuo@gmail.com
@inaju.mitchel on Instagram
@MitchelInaju on Twitter
Further Reading I highly recommend
